No matter how great the content on your website is, your hard work could amount to nothing without proper technical SEO.
Technical SEO gives your site structure, makes it super easy for search engine bots to crawl and index, and helps Google understand what each page is about.
URL structuring, robots.txt, redirect codes, canonical tags, .htaccess files, load time, and many others. It all matters.
Do all those things sound unfamiliar to you? No?
Well, you don’t need to.
Tons of companies already know this stuff and it’s really easy to work with them.
That’s where this guide comes in.
Our team at Neil Patel Digital researched, reviewed, and listed the top technical SEO companies on four criteria:
- Outstanding customer reviews.
- Awards, impressive clientele, and a long history of delivering stellar technical SEO work.
- Thought-leadership—consistently publishing of insightful articles and trends on the topic.
- A strong reputation amongst other SEO professionals.
From these criteria, we found technical SEO companies you can trust and what they’re good for:
The 4 Top Technical SEO Companies in The World
- Neil Patel Digital – Best for Technical Content Structuring
- Webris – Best for Technical SEO Audits
- Salt.agency – Best for Enterprise Technical SEO
- Orainti – Best for Ecommerce Brands
Without further ado, let’s dive into what makes us trust and bet our reputation on these companies.
1. Neil Patel Digital – Best For Technical Content Structuring
It’s been touted over and again that content is king. While there’s truth in this, what most people never take into consideration is content structuring.
Neil Patel Digital is the go-to SEO company for excellent content structuring.
Well, don’t take my word for it. Let me show you why.
From our years of extensive search engine optimization experience, we found that for content marketing to work and power long-term SEO strategy, it must have the right structure.
This is a key piece of our comprehensive SEO program.
And what have we to show for doing this, you ask?
The result of doing this speaks for itself:
Over 3 million visitors per month on this blog. All built from scratch.
Content was a huge part of this but the site wouldn’t be nearly as large without the right structure and technical SEO.
You can get access to this vast technical SEO expertise by working with the Neil Patel Digital team.
Today, we’ve developed a content marketing program with content structuring (in the form of content clusters) to help clients get technical SEO right from day one.
2. Webris – Best for Technical SEO Audits
Almost all great endeavors begin with taking in-depth audits of what’s already existing.
Technical SEO is no exception.
You won’t achieve much in your effort to optimize your site for search engine bots’ crawling and indexing without first doing a proper audit of your site’s structure.
And Webris is the company we recommend for technical SEO audits.
If you a do quick Google search for “technical SEO audit,” you’ll find this excellent content piece by Webris:
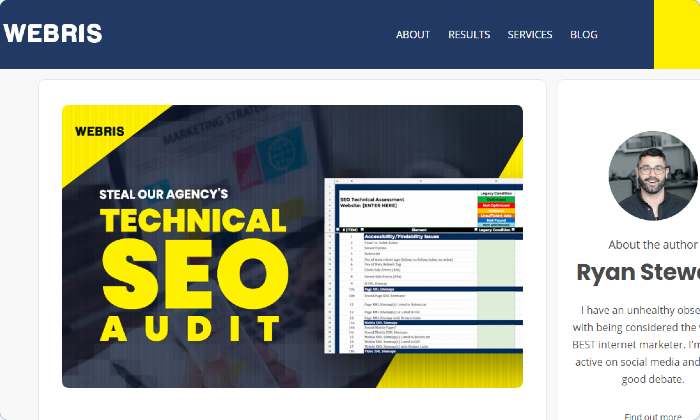
Ranking on Google’s top spot for this search term is another way of saying that earned its stripes on this list.
No company can earn that by accident.
This proves that Webris walks the talk when it comes to technical SEO audits and is a reliable option if you’re just getting started.
Founded by Ryan Stewart, the core strengths of Webris is technical SEO audits and conversion-focused UX. This company boasts of an incredibly talented team of advanced technical SEO consultants.
Major brands like Shopify and Accenture trust Webris and have worked with them.
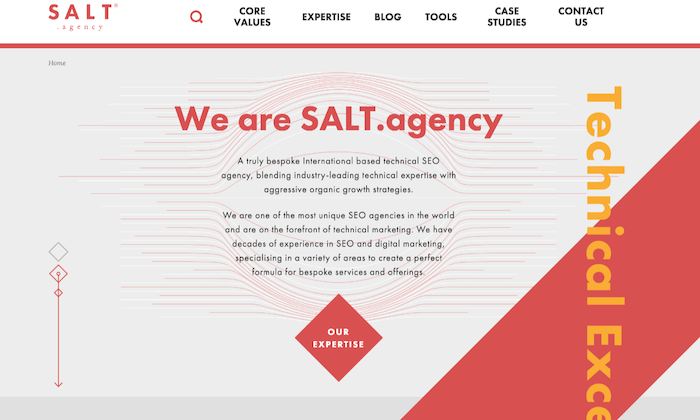
3. Salt.agency – Best for Enterprise Technical SEO
Salt.agency prides itself on “Technical Excellence” and that’s for a good reason. This company breathes technical SEO before anything else:
Massive enterprise sites can have all sort of crazy technical problems.
If you’re running one of these sites, you need a team that’s worked with that type of complexity before.
In this case, Salt.agency is the best option.
With offices in Boston, Leeds, and London, Salt.agency’s clients include Cloudflare, Hartley Botanic, Brex, Travel Supermarket, and many others.
4. Orainti – Best for Ecommerce Brands
Orainti specializes in providing technical and strategic SEO services for brands in competitive industries.
This company approaches digital marketing and search engine optimization with a technical mindset, which justifies its inclusion in this highly-vetted list.
And they work mostly with ecommerce brands selling internationally.
International ecommerce businesses have tons of unique challenges like dealing with multilingual sites, getting product and category pages ranked properly, and avoiding duplicate content.
Orainti comes highly recommended for this.
Aleyda Solis is the Founder of Orainti. She is a veteran SEO practitioner, speaker, and author who has earned recognition and awards for her technical SEO expertise by organizations such as Forbes and European Search Awards.
Orainti boasts an impressive portfolio of top brands, including Zillow, Under Armour, Sage, Eventbrite, and others.
5 Characteristics That Make a Great Technical SEO Company
What separates the good technical SEO shops from the great ones? What would you specifically look for when choosing someone to work with?
Here’s what I look for.
1. A Complete Implementation Process that Includes Technical SEO
Technical SEO brings structure to your site. It helps search engine bots crawl, index, and rank your website correctly, which is essential for driving traffic.
Also, it helps to boost your site’s load time.
However, this doesn’t mean that once you have an excellent technical SEO, everything search engine optimization will fall in place automatically.
The best technical SEO companies have a complete SEO program including manual site review, technical SEO implementation, content strategy, and others.
If you’re really good at SEO already and just need a quick SEO audit to double check everything, you could get value at working with a specialist. But for everyone else, I recommend working with someone that understands the complete SEO strategy. It’s the only way to build a site with tons of traffic.
2. Thought leadership
It takes lots of experimentation to implement technical SEO strategies that move the needle. Companies that embark on this kind of excruciating work always like to document their experience and findings.
Working with SEO thought leaders increases the odds of a successful project.
After all, if someone can successfully teach technical SEO, they can also help your business directly.
Publishing cutting-edge content about technical SEO is a great sign that they’ll deliver amazing results.
3. An Impressive Client Portfolio
An excellent way to see if the expertise and processes used by a technical SEO company works is by looking at its client portfolio.
There is nuance here.
Having a ton of major brands is great. But that doesn’t mean that you can get help with your exact situation.
Ideally, the technical SEO company has worked with similar companies like your own.
4. Real Life Results
The nice thing about technical SEO is that it’s extremely practical. Technical problems come up that tanks traffic. Then technical SEO experts fix those problems.
It’s cut and dry.
Any great technical SEO company should have plenty of case studies where they turned around a site after it got hit. The more obscure the technical problem, the more likely they’ll be able to find weird problems on your own site.
Sometimes, these case studies are published on their site. But a lot of companies don’t like sharing the best stories. So ask their team as you talk to them. They should be able to give you plenty of examples during a call.
5. A Diversified Team
Covering every last technical SEO requirement is way too big of a task for a single person. You’ll need a fully-staffed team to do it all. Especially on major sites.
Go through the company’s team pages and LinkedIn employees, then look for lots of depth and expertise across the entire team.
What to Expect from a Great Technical SEO Company
If you’re like most people who only realize the need for technical SEO late on, you’ll probably be wondering what you should expect from one.
The most significant things to expect are what follows.
1. A discovery session
After you reach out to a technical SEO company, they’ll want to get on a call to understand what you’re looking for.
It’s the only way to understand the goals that you have for your site.
If a technical SEO company wants to jump straight into an audit without even getting on the phone, it’s a sign they’re running an “audit mill” and aren’t going to spend much time on your project.
Find a company that wants to go really deep and understand the full picture.
2. A one-time audit proposal
Most technically SEO companies will perform a one-time audit for a flat fee.
Since this is a standard part of their practice, they can usually jump into this right away.
Assuming their fee works with your budget, you could have someone get started within a week. That’s how easy it is to get going.
Before starting the audit, ask them for everything that they’ll check. It should include everything like canonical problems, indexing issues, duplicate content, other Google Search Console errors, everything.
If the list doesn’t feel extremely comprehensive, get a few quotes from other companies.
3. Completing the audit
Once you’ve agreed to move forward with an audit, the company will get started.
These usually take a few weeks to complete, depending on the size of your site.
Of course, you’ll need to give them access to your Google Analytics, Google Search Console, WordPress account, and possibly your web host.
During the audit, there shouldn’t be much work for you or your team. The company performing the audit may have questions but they can do the vast majority of the work on their own.
4. Implementation proposal
Most technical SEO audits only include the discovery of site issues. The project doesn’t usually include the work that’s required to fix any problems.
This is because most problems don’t have easy fixes.
For example, if your site has terrible site speed that’s impacting your rankings, you’ll need to do a ton of front-end work in order to fix it. That will also involve your marketing team and possibly other agencies.
So once the audit is complete, expect to see a proposal that includes implementing any solutions.
Something to watch for here: a great technical SEO company will know the limits of it’s expertise. When they find problems outside their capabilities, they’ll tell you and advise you to work with someone else on fixing them. Site rebuilds and content marketing are good examples of this.
If a technical SEO agency tells you that it can fix every single problem, double check and make sure they truly have real expertise in those areas.
Should I take Technical SEO Seriously?
Yes!
Technical SEO is like the frame of your house. Only with good bones can your content and marketing drive traffic to your site.
But, as things add up, and you have hundreds or thousands of pages on your site, something is going to break.
Search engines have a harder time crawling your site, content isn’t indexed, and your site speed slows way down.
Even if you start with a great foundation, you need a healthy rebuild every few years.
If you haven’t done a deep technical SEO audit recently, now’s the time.
The post The 4 Best Technical SEO Companies of 2020 appeared first on Neil Patel.
source https://neilpatel.com/blog/technical-seo-companies/